
Rounded Gel Banner
July 31st, 2013
This is an advanced tutorial on how to make a gel-like banner.
Prequisites
Please know how to do the following before using this tutorial.
- Exercise: Selections – Be sure you know how to load a selection.
Objective

Tutorial
-
Make a new canvas and fill the background with some sort of color or background. I will be using a 350x150px one with a black gradient


-
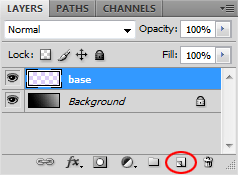
Make a New Layer
 . I will name mine, base.
-
Select the Rounded Rectangle tool
 . Make sure Fill Pixels (also called “Create filled region”) is selected. I will be using a 20px radius, though you can adjust this as you like.

-
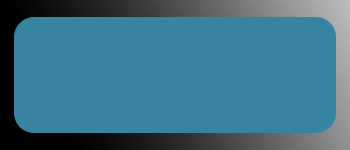
On layer base, create a Rounded Rectangle in the color of your choice.
-
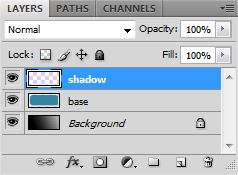
Create a New Layer on top of layer base. I will name it shadow.
-
Select the Gradient tool and use a black to transparent Linear Gradient.

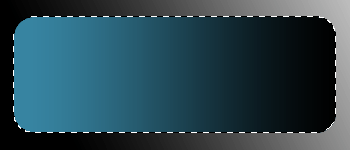
Load a selection on layer base. (Tutorial: Exercise: Selections, step 6) Then make a gradient from right to left on layer shadow.
-
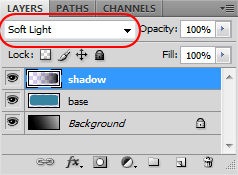
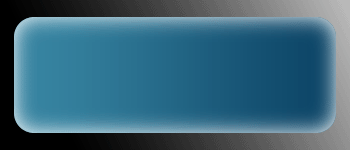
Set the Blending Option of layer shadow to Soft Light.
Now we have…

-
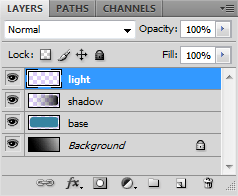
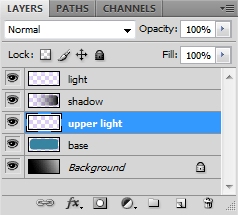
Create a New Layer above layer shadow. I will name it light.
-
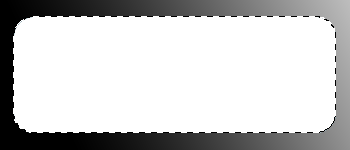
Load a selection on layer base, and then fill layer light with white using the Paint Bucket tool
 .
.
-
Go to Select >> Modify >> Feather (or Select >> Feather in old versions). Set it to 10px and then hit Delete on your keyboard.
-
Set the Blending Option of layer light to Overlay.
-
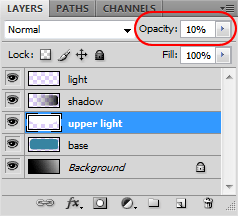
Create a New Layer underneath shadow. I will name it upper light.
-
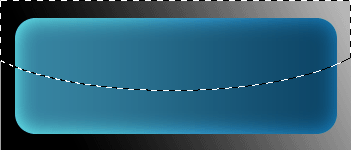
Use the Elliptical Marquee
 and make a curved shape on the top half of the rectangle.
-
Fill layer upper light with white using the Paint Bucket

-
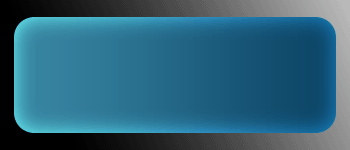
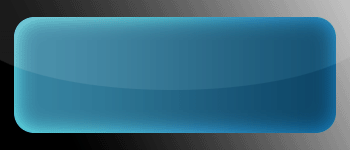
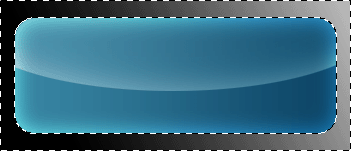
Set the Opacity of layer upper light to 10%.
Which looks like this…
-
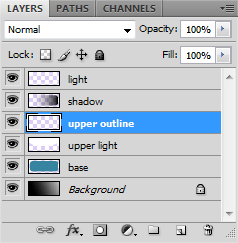
Create a New Layer above layer upper light. I will name mine upper outline.
-
Load a selection on layer upper light, and then fill layer upper outline with white using the Paint Bucket .

-
Go to Select >> Modify >> Feather and set it to 15px. Hit Delete on your keyboard. Lower the Opacity of layer upper outline to 50%.
-
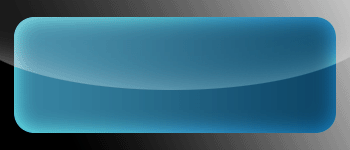
Load a selection on layer base and then invert it (Ctrl+Shift+I).
Hit Delete on your keyboard for layers upper light and upper outline. This deletes off the extra parts that were sticking out of the rectangle.
-
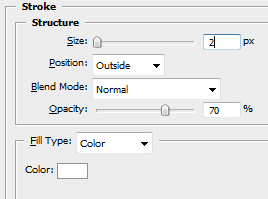
Select layer base, and then select Stroke from the Layer Styles
 . Set the size to 2px, opacity around 50-70%, and the color to white.
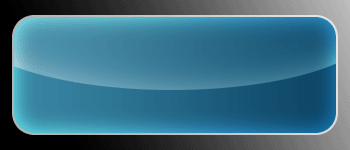
This gives us…
-
The banner is pretty much done! For a final touch, use the Text tool
 to write something on it. Set the text’s Blending Option to Overlay.

Leave a Reply