

Blending Edges
August 1st, 2013
This is a technique that blends the background into the main image, instead of the other way around.
Objective
Original

Finished result

Prerequisites
Please know how to do the following before using this tutorial.
- Making extractions
- Exercise: Selections – Please know how to load a selection.
Tutorial
-
Open a new canvas and paste the background of your choice on it.

-
Paste the extracted image on top. (Tutorial: Making extractions)

They should be on separate layers.
-
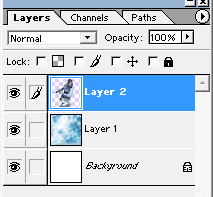
Duplicate the background image (Ctrl+J or right click the layer and select Duplicate Layer).
-
Move the background copy so that it’s the top layer. You can do this by clicking and dragging the layer.
-
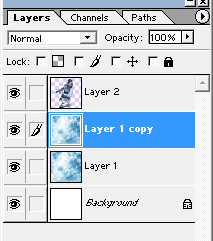
Load a selection on your extracted image. (Tutorial: Exercise: Selections, step 6)

-
Go to Select >> Modify >> Feather (or just Select >> Feather in old versions) and use around 30px. (If it gives you a warning, use a lower number.)

-
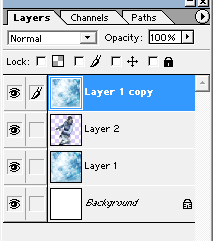
Select your top most layer (the background copy). Hit Delete on your keyboard. Now the background is fading into the edges of the main image!

-
On mine, I prefer if the face stood out more. I’m going to select the Eraser
 with a large brush with faded edges. On the top layer (background copy), I’m erasing a little of the top.

-
And that’s it! The reason why I like this way better sometimes is because it gives you some control on what parts should be blended and what shouldn’t. It also works better for skinnier areas, like her arms in this case.

Leave a Reply