
Grungy Border
December 17th, 2014
Not exactly grunge, but a nifty border you can make without brushes.
Objective
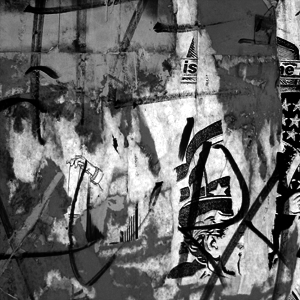
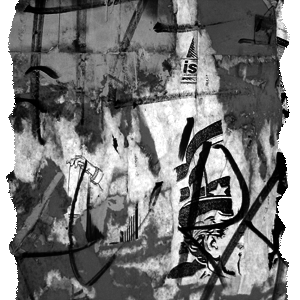
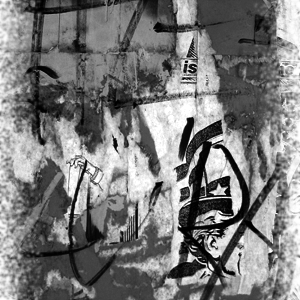
Original
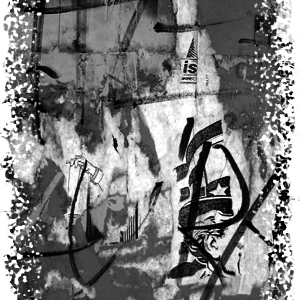
Finished result
Tutorial
- Copy and paste the image of your choice onto a new canvas.
-
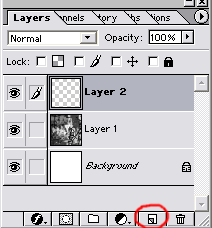
Make a New Layer
 above your image.
-
On this new layer, make a thin uneven border on the right and left sides using the Paint Brush tool


-
Set the Blending Option of the layer to Dissolve.
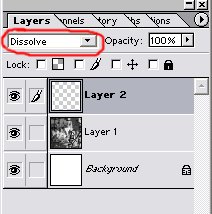
This will make the edges a little grainy.
-
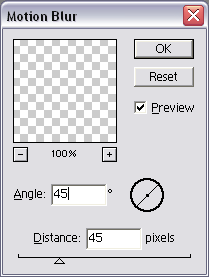
Now let’s make it more grainy! Go to Filter >> Blur >> Motion Blur. Set the Angle to 45 degrees and the Distance around 45 pixels.
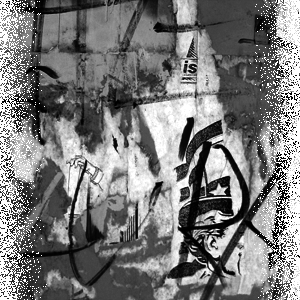
That gives us this:

-
Do the Motion Blur again, except this time use -45 degrees as the Angle. This will blur the opposite way and spread it out more.
-
Make a New Layer between the top layer and the original image. (In my case, Layer 3 is my new layer.)

-
Select the very top layer (Layer 2 in my case), and Merge Down (Ctrl + E) onto the new layer we just created.
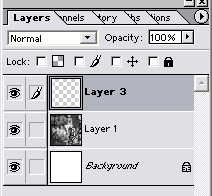
The reason why we did this is because now we still have this grainy look, but the Blending Option is now Normal instead of Dissolve.
-
This lets us make edits to the grainy parts. Go to Filter >> Blur >> Gaussian Blur. Set it to 1px.
-
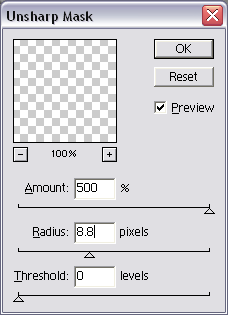
To define the blurry parts, go to Filter >> Sharpen >> Unsharp Mask. Make sure the Amount is on 500% and the Radius is somewhere around 7-10 pixels.
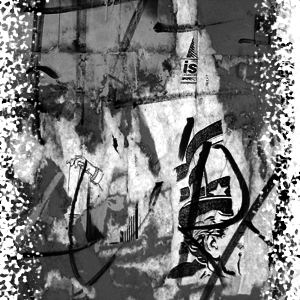
That will give us this look:
-
The last step! Take the Paint Brush tool again and fill in some holes to make it more solid in some places.
And we’re finished!

Leave a Reply