
Exercise: Layer Masks
February 15th, 2015
This tutorial goes through the basics of using Layer Masks to add transparent areas without affecting the original image.
Tutorial
-
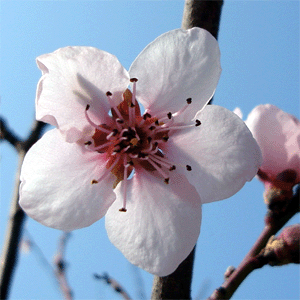
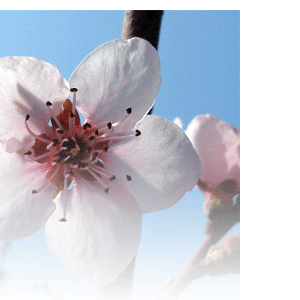
Copy and paste the image of your choice onto a new canvas.
-
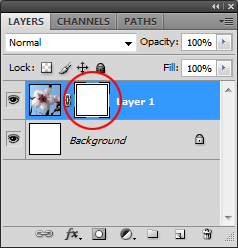
Adding a layer mask
To add a layer mask, click the Add vector mask action
 (“Add a mask” on older versions) on the Layers panel.
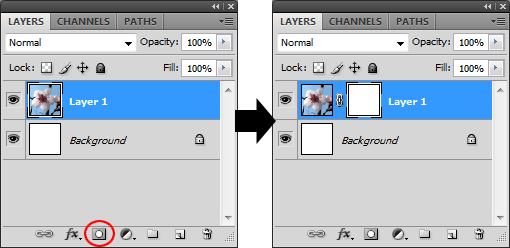
-
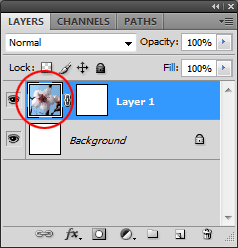
Switching to layer editing
To edit on the layer itself and not the mask, click on the left rectangle to select the layer.
-
Switching to mask editing
To edit on the mask (so it doesn’t alter your original image), click on the right rectangle to select the mask.
-
Adding Transparency
Make sure the mask is selected like in the previous step. Choose black as your foreground color, and use the Paint Brush
 to color in areas you want to be transparent.
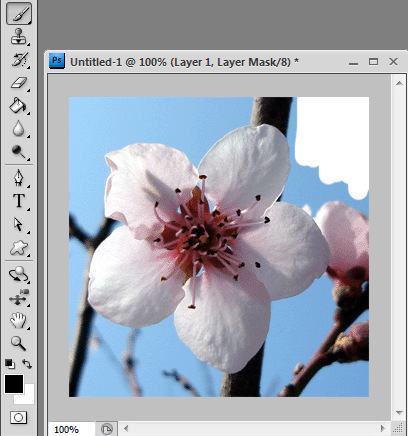
You are actually not altering the original image in any way. All of this is done on the mask.
-
Semi-transparency
Masks only see Grayscale colors and will use the grayscale equivalent of whatever color you are using. Black is 100% transparent, and white is 0% transparent. Anything in between is semi-transparent.
For example, I will use a gray color instead of black. When I use the Paint Brush
again, I create semi-transparent areas instead of fully transparent.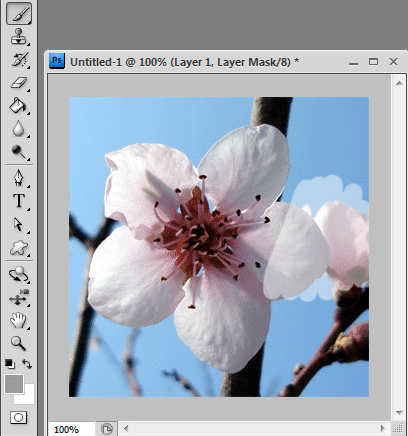
-
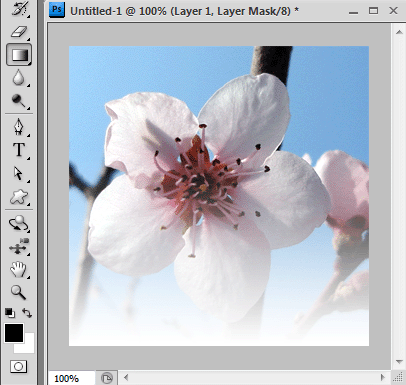
Fading out areas
This means that I can use a gradient to fade out areas. Select the Gradient tool
 and use a Linear Gradient that goes from black to transparent.
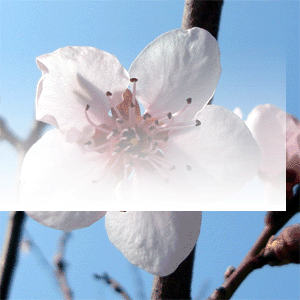
Make sure the mask is selected, and create a gradient from the bottom to top. Now the bottom of the image is faded out.
-
Linking
By default, the mask and layer are linked together. You can tell by this chain-looking icon between them.

This means if you move the mask or layer, they move together and don’t get separated.
-
Unlinking
To unlink the layer from the mask, click on the chain icon to make it go away.

Now when you move the mask or layer, they don’t move together. They are separated now.
-
Deleting masks
To remove a mask, select it, and then hit the Delete action
 at the bottom of the Layers panel.
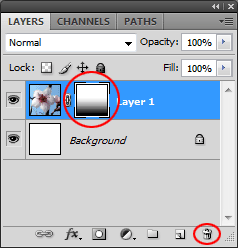
It will ask you to Apply or Delete the mask before removing. Use Apply to merge the mask and layer together, altering your original image. Use Delete to remove the mask completely, without touching your original image.

Leave a Reply